
Spanish Melon, Serrano Ham and Feta Salad
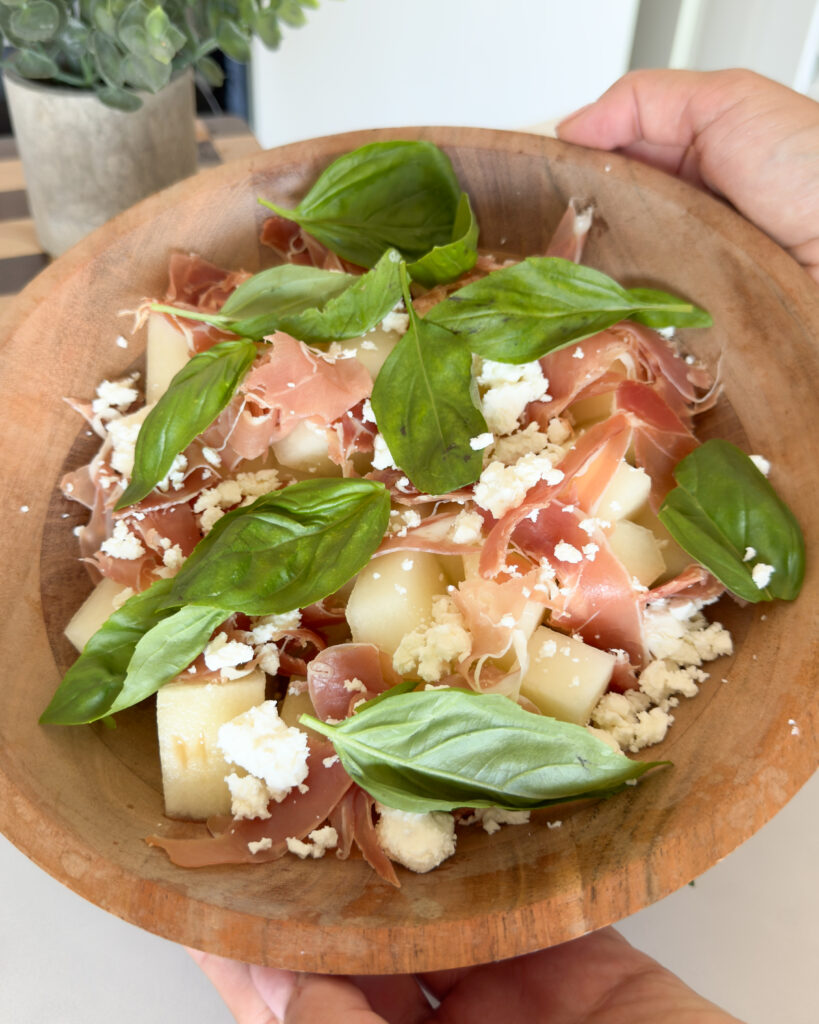
This is the salad I make when it’s too warm to stand near a stove and I want dinner to taste like the last night of a Spanish trip. Sweet melon, salty serrano ham, tangy feta and a scatter of basil – it comes together in the time it takes to set the table, and it tastes like far more thought went into it than actually did. Piel de Sapo melon is the one to look for if you can find it – it’s sweeter and less watery than a lot of other varieties, and it holds its shape well against the salt of the ham. If you can’t get hold of it, any ripe, sweet melon will do the job. Why This Recipe Works Sweet and salty is one of those pairings that always works, and this salad leans right into it. The melon brings the sweetness, the serrano ham brings the salt and a bit of chew, and the feta sits somewhere in between with its own tang. A honey and lemon dressing pulls the whole plate together, and fresh basil keeps it tasting bright rather than heavy. Ingredients ½ a Spanish Piel de Sapo melon, cut into small wedges (or around 4 cups cubed) 84-100g Jamón Serrano, thinly sliced 150g feta, crumbled A large handful (about 15g) fresh basil leaves 2 tbsp olive oil 1 tbsp cider or sherry vinegar 1 tsp honey A squeeze of fresh lemon juice Black pepper, to finish Method Arrange the melon. Lay the melon wedges or cubes across a large serving plate or wide bowl. Add the ham and feta. Drape the serrano ham slices over and around the melon, then scatter the crumbled feta on top. If you like a bit more texture, crisp the ham in a dry pan for a minute or two first and let it cool before adding. Make the dressing. Whisk together the olive oil, vinegar, honey and lemon juice until combined. Dress and finish. Drizzle the dressing over the salad, then scatter over the fresh basil leaves and a good grind of black pepper. Tips for the Best Results Chill the melon first. Cold melon against room-temperature ham and feta gives the best contrast – pop it in the fridge for an hour before serving if you have time. Tear the ham. Tearing rather than laying the slices flat gives a bit more texture and lets the dressing reach every layer. Season the melon lightly. A small pinch of salt on the melon before you add anything else brings out its sweetness. Use good olive oil. With so few ingredients, a decent extra virgin olive oil makes a real difference to the dressing. What to Serve With This Salad This works well as a starter before something grilled, or as part of a spread with crusty bread, olives and a chilled glass of something crisp. It’s an easy one to scale up for a table of friends on a warm evening. Storage This salad is best made and eaten straight away, as the melon releases juice once dressed. If you want to prep ahead, keep the melon, ham, feta and dressing separate and assemble just before serving.
Peach Burrata Salad with Hot Honey
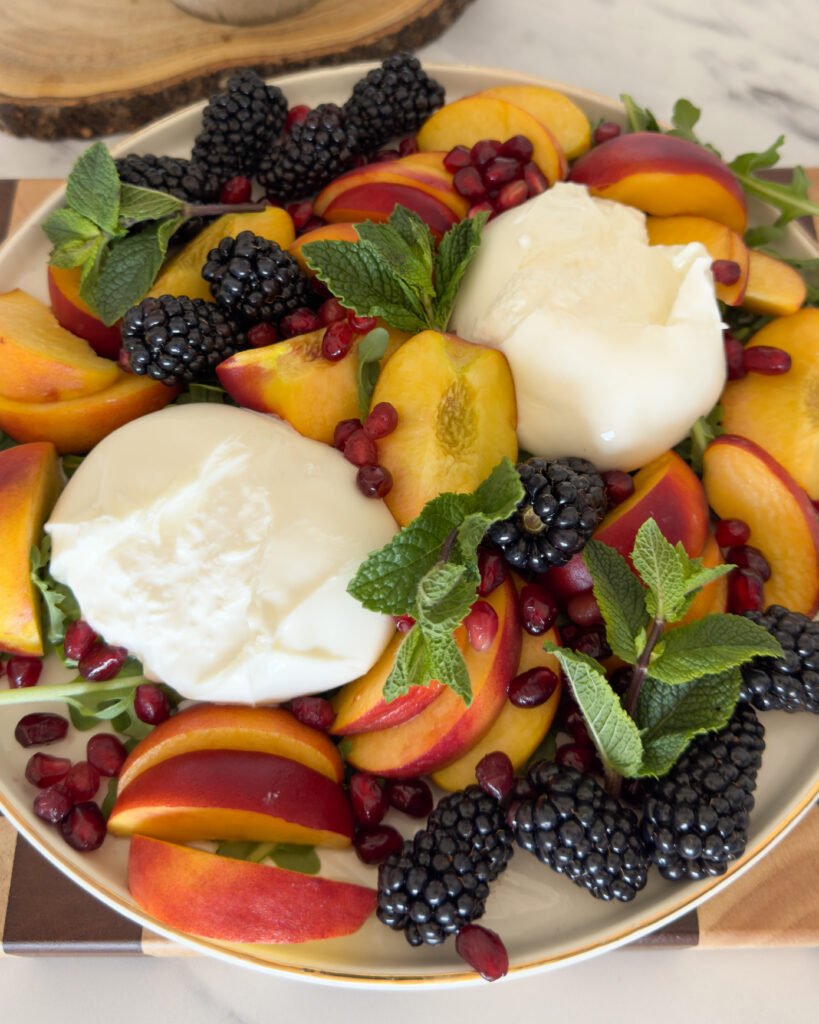
This is the dish I make when I want dinner to feel like a warm evening somewhere else, without turning the oven on. No cooking, five minutes of assembly, and a plate that looks like it belongs on holiday. Ripe peaches, torn burrata, a scatter of blackberries and pomegranate, and a drizzle of hot honey over the top – it’s become my go-to starter the moment peaches come into season, and just as good served as a light dinner with bread on the side. Why This Recipe Works Burrata does most of the work here – it’s rich and milky in a way that needs almost nothing added to it, just something sweet, something sharp and something with a bit of texture around it. Peaches and blackberries bring the sweetness, pomegranate adds a pop of acidity, and hot honey ties it all together with a little warmth at the end. Rocket underneath keeps it from feeling too rich. Ingredients 2 burrata 3 peaches, sliced A bed of rocket A handful of blackberries Pomegranate seeds, for topping Fresh mint leaves, for topping Hot honey, for drizzling Method Build the base. Arrange a bed of rocket across a large serving plate or shallow bowl. Layer the fruit. Scatter the sliced peaches and blackberries over the rocket. Add the burrata. Tear the burrata into pieces and nestle it among the fruit and leaves – torn burrata spreads its creamy centre further than a whole ball would, so you get a bit in every bite. Finish. Scatter over the pomegranate seeds and mint leaves, then drizzle generously with hot honey just before serving. Tips for the Best Results Use ripe peaches. This salad lives or dies on the fruit, so go for peaches that give slightly when pressed and smell sweet at the stem. Room temperature burrata. Take it out of the fridge 15-20 minutes before serving – cold burrata is far less creamy than one that’s had a chance to soften slightly. Tear, don’t slice. Tearing the burrata by hand gives you more surface area for the honey and juices to soak into. No hot honey? Warm regular honey with a small pinch of chilli flakes for a minute, and use that instead. What to Serve With Peach Burrata Salad This works well as a starter before something grilled – chicken, fish or a simple steak – or as a light dinner on its own with good bread to mop up the juices. It also holds up well on a summer table alongside other salads and cold cuts. Storage Best eaten straight away, while the burrata is soft and the peaches are at their juiciest. If you need to prep ahead, slice the fruit and store it covered in the fridge, but leave the burrata and honey until just before serving.
Crispy Air Fryer Parmesan Butter Potatoes
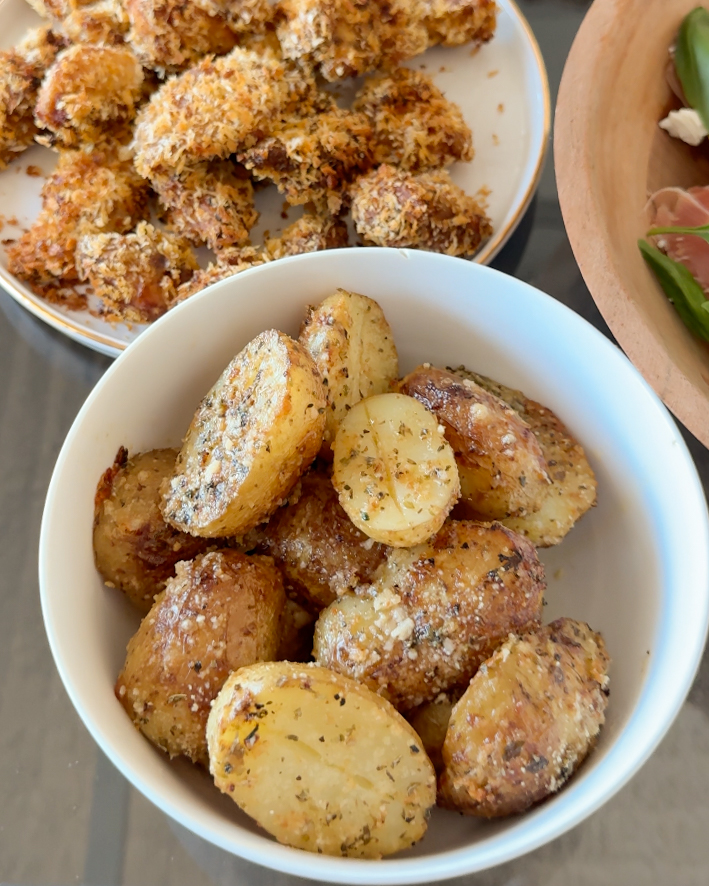
Some recipes are dinner. This one is a side dish that quietly steals the show. I’ve made a version of these more times than I can count now, and they’ve become the thing I reach for whenever a Sunday roast is on the cards – crisp at the edges, soft in the middle, and coated in enough butter and parmesan that nobody at the table is going to call them healthy. They’re not meant to be. That’s the whole point. The method could not be simpler – just baby potatoes cut in half, tossed in melted butter, a good amount of parmesan, and a scattering of rosemary, with the air fryer doing the rest. Why This Recipe Works Cutting the potatoes in half gives you a flat, cut side that goes deep golden and crisp against the base of the air fryer, while the rounded skin side stays soft underneath. Adding parmesan at two points during cooking means you end up with a layer that goes deep golden rather than just melting away. Ingredients 6-10 baby potatoes, halved 70g butter 75g parmesan, in total 1 tsp paprika 1 tsp garlic (fresh or granules) Salt and pepper Fresh rosemary Method Prepare the potatoes. Cut each baby potato in half. Melt the butter. Melt the 70g of butter in the microwave or a small saucepan. Season the air fryer base. Pour a little of the melted butter into the base of the air fryer, then scatter in some of the parmesan along with the paprika, garlic, salt and pepper – this builds a layer of flavour underneath the potatoes as they cook. Glaze and season. Toss the potatoes in the remaining melted butter (or a light oil spray), then place them cut-side down in the air fryer. First cook. Top with more parmesan and air fry at 200C for 20 minutes. Second cook. Turn the potatoes, add another layer of parmesan and the fresh rosemary, then air fry for a further 10 minutes at 200C, until deep golden and crisp at the edges. Tips for the Best Results Cut-side down. Placing the flat side against the base of the air fryer is what gives you that deep golden crust. Layer the parmesan. Adding it twice – once before cooking and again halfway through – gives a better crust than adding it all at once. Toss well in butter. Make sure every potato half is fully coated before it goes in, so the parmesan has something to cling to. Add rosemary early if you can. It crisps up nicely alongside the potatoes; if it goes in late, it will still taste good, just slightly less crisp. Tips for the Best Results Thighs, not breast. Chicken thighs stay juicy under high heat, which matters more in an air fryer than an oven. Breast will dry out faster. Don’t skip the rest. Even 30 minutes of marinating time makes a real difference to how much flavour the chicken picks up. Compact skewering. Push the pieces close together on the skewer so they hold their moisture and cook evenly, rather than drying out at the edges. No Ninja Crispi? This works in any air fryer – just keep an eye on timing, as models vary slightly.
Air Fryer Lemon Garlic Chicken Skewers
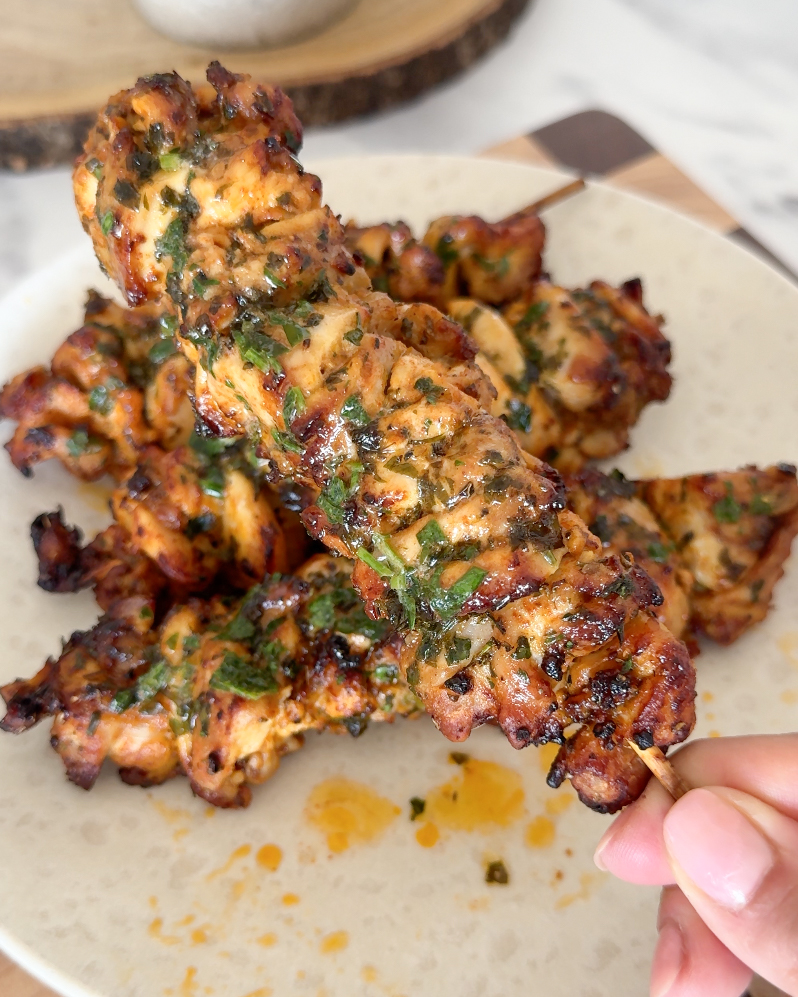
These lemon garlic chicken skewers have earned a permanent spot in my weekly dinner rotation, and once you’ve made them, you’ll understand why. The marinade is bright with lemon and garlic, the chicken comes out of the Ninja Crispi charred at the edges and cooked through in the centre, and the whole thing gets finished with a lemon parsley butter brushed on while it’s still hot. It’s the sort of dinner that tastes like far more effort went in than actually did. Why This Recipe Works This is a simple recipe, and that’s exactly the point. A short ingredients list, one bowl for the marinade, and an air fryer doing most of the work. The lemon and oregano give it a bit of a Mediterranean lean, while the butter finish takes it somewhere richer. It’s quick enough for a weeknight and good enough that I’ve served it to friends without a second thought. Ingredients For the chicken: Zest of 1 lemon (just the bright yellow skin, none of the white pith) 2 tbsp lemon juice 1 tbsp mayonnaise 1 tbsp olive oil 2 large garlic cloves, finely grated 1½ tsp dried oregano ¾ tsp paprika ¾ tsp salt ½ tsp black pepper 640g boneless, skinless chicken thighs, sliced into bite-sized pieces For the lemon parsley butter: 75g butter, softened 1 tbsp fresh parsley, finely chopped 2 tsp lemon juice ¼ tsp paprika ¼ tsp black pepper ⅛ tsp salt, or to taste Method Make the marinade. In a medium bowl, whisk together the lemon zest, lemon juice, mayonnaise, olive oil, garlic, oregano, paprika, salt and pepper. Stir in the chicken until every piece is coated. Cover and leave to marinate for 30 minutes at room temperature. Skewer and cook. Thread the chicken onto four skewers, leaving a small gap at each end so the pieces cook evenly. Place them in the Ninja Crispi and brush over any leftover marinade from the bowl. Cook for 13 minutes at 200C/400F. While that’s going, mix together all the butter ingredients in a small bowl. Baste and finish. After 13 minutes, flip the skewers and brush over roughly a quarter of the lemon butter. Cook for a further minute, flip again, brush with another quarter of the butter, then cook for one final minute, or until lightly charred and cooked through (internal temperature should reach at least 74C/165F). Serve. Remove the skewers and brush over the remaining lemon butter while they’re still hot – this is where most of the flavour lands, so don’t hold back. A squeeze of extra lemon juice at the end works well if you like things sharper. Tips for the Best Results Thighs, not breast. Chicken thighs stay juicy under high heat, which matters more in an air fryer than an oven. Breast will dry out faster. Don’t skip the rest. Even 30 minutes of marinating time makes a real difference to how much flavour the chicken picks up. Compact skewering. Push the pieces close together on the skewer so they hold their moisture and cook evenly, rather than drying out at the edges. No Ninja Crispi? This works in any air fryer – just keep an eye on timing, as models vary slightly. What to Serve With Chicken Skewers I usually go simple: a herby rice or a flatbread, a crisp green salad, and a spoonful of yoghurt or tzatziki on the side. Leftovers are good cold the next day too, sliced into a wrap with salad and a squeeze of lemon. Storage Keep leftovers in an airtight container in the fridge for up to 3 days. Reheat gently in the air fryer for a few minutes to bring back some of the char, rather than the microwave, which tends to leave the chicken a bit rubbery.