If you’ve ever bitten into a cake and thought: how is this buttercream so impossibly smooth? There’s a very good chance it was Swiss Meringue Buttercream. And once you try it, I promise you’ll never go back to anything else.
I’m not exaggerating when I say this recipe changed the way I bake. It’s the kind of buttercream that makes people stop mid-bite and ask what on earth you put in it. The answer? Egg whites, sugar, butter, and a little patience. That’s it.
This is my signature recipe – the one I use for every celebration cake, every tall layer cake, every time I need something that looks stunning and tastes even better. I’m sharing every detail here so you can nail it first time.
What Is Swiss Meringue Buttercream?
Swiss Meringue Buttercream — SMBC if you’re in the know — is made by heating egg whites and sugar together over a bain-marie until the sugar fully dissolves, then whipping the mixture into a glossy meringue before adding butter. The result is a buttercream that is silky smooth, not overly sweet, and absolutely luscious to work with.
Compared to American buttercream (the classic icing sugar and butter combo), SMBC is far less sweet, far more stable, and dramatically smoother. It’s also incredibly versatile — you can flavour it almost any way you like.
It does take a little longer than chucking icing sugar in a bowl, but the results are absolutely worth it. Think of it as the kind of bake that you make slowly, with a glass of something nice, on a Sunday afternoon.
Why This Recipe Works
There are a few things that set this recipe apart from others you might have tried:
- It uses a 2:1:2 ratio of sugar to egg whites to butter — perfectly balanced and reliable every time.
- The optional addition of vegetable shortening (Trex in the UK) gives you that gorgeous bright white finish and extra stability — brilliant for warmer weather.
- The final step of mixing on low with the paddle attachment for 8–10 minutes is the secret weapon. It removes every last air bubble and gives you the smoothest, most velvety texture imaginable.
- It can be flavoured endlessly — chocolate, Biscoff, lemon, pistachio, matcha, caramel. You name it, it works.
What You’ll Need
This recipe makes enough to fill and cover a 5-inch, four-layer cake.
The Essentials
- 500g sugar (caster or granulated both work)
- 250g egg whites (fresh or pasteurised carton — I use carton)
- 500g unsalted butter, softened
- ½ tsp salt
- 1 tsp vanilla extract
Optional but Recommended
- 1/8 tsp cream of tartar (helps stabilise the meringue)
- 50–75g vegetable shortening, such as Trex (for a whiter, more stable result)
- Vinegar or lemon juice (for wiping down your equipment)
A quick note on egg whites: carton pasteurised egg whites are my personal preference. The meringue whips up a little softer, but the end result is just as incredible — and it saves the faff of separating eggs. Both work brilliantly.
Before You Start: The Prep That Matters
This is the bit most people skip and then wonder why their meringue won’t whip. Please don’t skip it.
- Read the full recipe before you do anything else. Seriously.
- Get your butter out of the fridge an hour before you start. You want it soft enough to leave a dent when you press your finger in — not melting, not cold.
- Wipe your stand mixer bowl, spatula, and whisk attachment with vinegar or lemon juice. Even a trace of fat will stop your meringue from whipping. This step is non-negotiable.
- Measure everything out and have it ready to go. Swiss Meringue Buttercream rewards organisation.
- Get a sugar thermometer if you don’t already have one. You’ll need it to hit the safe temperature range for the meringue.
Three Tips for the Perfect Chocolate Cake
1. Use good quality cocoa powder. I cannot stress this enough. The quality of your cocoa is the single biggest factor in how your cake tastes. Splurge the extra pound or two — your future self will thank you enormously.
2. Don’t overbake. Pull the cakes out when a skewer comes out with a few moist crumbs still attached. The residual heat will finish the job as they cool, and you’ll end up with a beautifully fudgy texture rather than a dry, disappointing one.
3. Cool completely before frosting. I know, I know — it feels impossible. But if you try to frost a warm cake, the buttercream will melt, slide off, and you’ll end up with a chocolatey mess (delicious, but chaotic). Give the layers a full hour to cool properly. Use the time to make the frosting, do a bit of tidying, walk the dog — whatever gets you through. You can even bake the layers the day ahead and store them wrapped in the fridge until you’re ready to fill and decorate.

The Method, Step by Step
Take it one step at a time and you’ve got this.
Stage 1: The Bain-Marie
- Set up a bain-marie: heat water in a saucepan over medium-high heat until it simmers.
- Combine the sugar and egg whites in a heat-proof bowl (I use the KitchenAid bowl directly). Place it over the simmering water, making sure the bowl doesn’t touch the water.
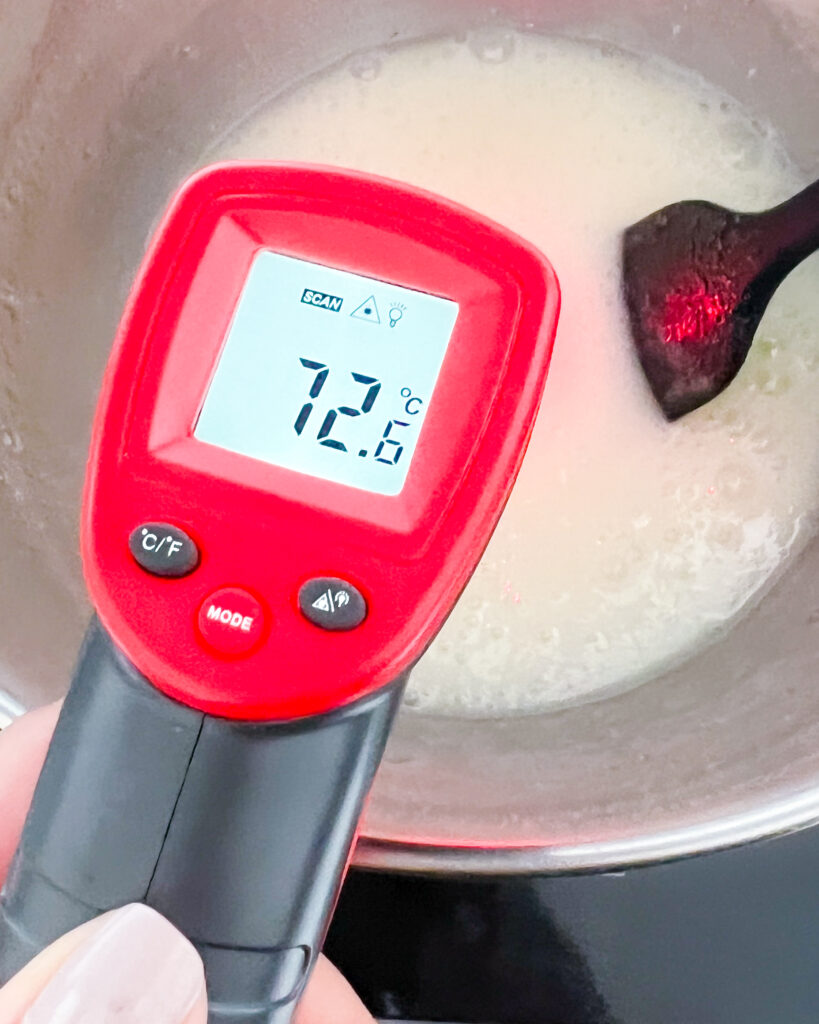
- Stir continuously for around 10 minutes until all the sugar is fully dissolved. To check, rub a small amount between your fingers — it should feel completely smooth with no grittiness. Keep going until it does.
- Use your sugar thermometer to monitor the temperature. Aim for 75°C — the safe range is 65–80°C.
Stage 2: Building the Meringue
- Transfer the mixture to your stand mixer (or attach the bowl if you used it for the bain-marie). Fit the whisk attachment.
- Start on low-medium speed (speed 3 on a KitchenAid) and add the salt and cream of tartar. Mix for one minute.
- Increase to medium speed (speed 5) for another 1–2 minutes.
- Increase to high (speed 7) and keep whisking until the meringue has formed — this takes 20–25 minutes. The bowl should feel close to room temperature and the meringue should look glossy. If you used fresh egg whites, you’ll have stiff peaks; carton egg whites will give a slightly softer result.
Stage 3: Adding the Butter
- Reduce to low speed (speed 2). Start adding your softened butter in chunks, one at a time.
- Once all the butter is in, add the vegetable shortening straight from the fridge. This is the secret to a beautifully white, stable buttercream.
- Keep mixing on low. Your buttercream might look curdled or sloppy at this stage — do not panic. Keep going. It will come together, even if it takes a while.
- Once the buttercream has formed, add the vanilla extract. Increase to medium speed and whisk for a further 5 minutes.
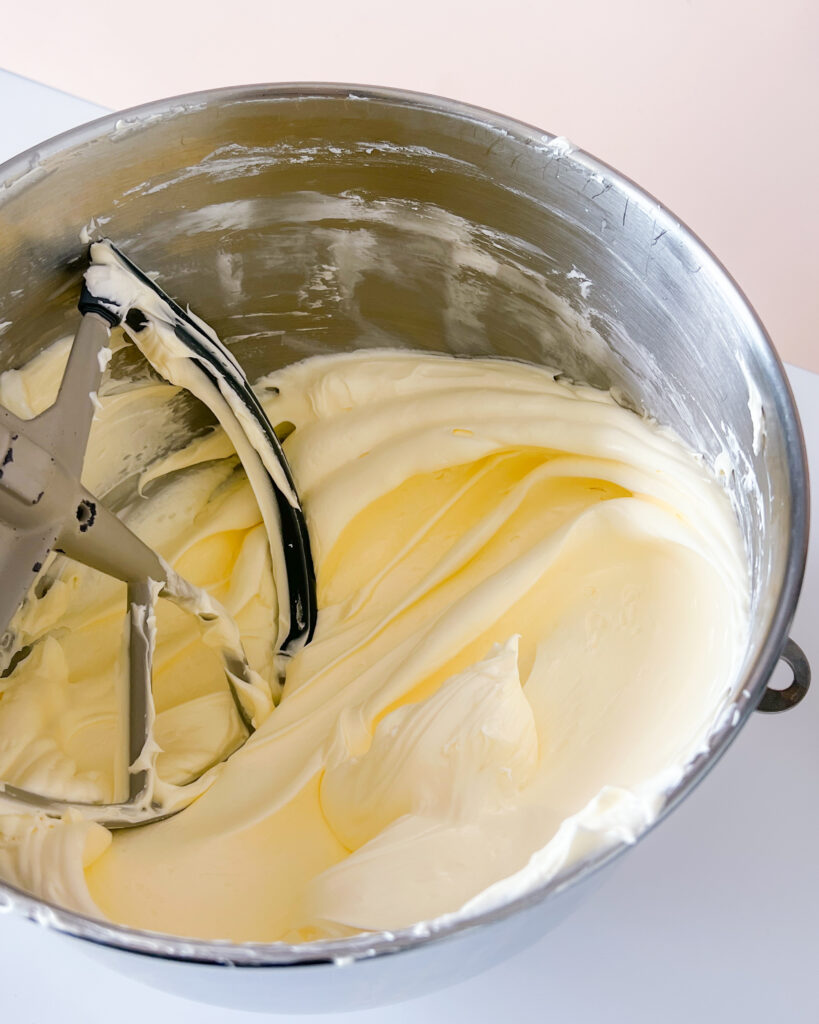
Stage 4: The Finishing Touch
- Switch to the paddle attachment. Mix on medium (speed 4) for a couple of minutes, then increase to speed 6 for another 3–4 minutes.
- If the buttercream looks too soft, pop the bowl in the fridge for 10–15 minutes, then re-attach and mix again.
- Once you’re happy with the consistency, reduce to the lowest speed and paddle for 8–10 minutes. This is the step that makes all the difference — it removes air bubbles and gives you that ultra-smooth, velvety finish.

Tips, Troubleshooting & Common Questions
My buttercream looks curdled. What do I do?
Don’t bin it! This usually means the butter was too cold. Try microwaving about a quarter-cup of the buttercream for a few seconds and adding it back in while the mixer runs on low. Alternatively, gently warm the edges of the bowl over a bain-marie and whip again. It will come together.
My buttercream looks really sloppy.
Temperature is almost always the culprit. Pop the bowl in the fridge for 10–15 minutes to firm things up, then re-attach and mix again.
How do I get it truly white?
The vegetable shortening is your friend here. If you’d rather not use it, add a tiny drop of violet food colouring instead — it counteracts the yellow from the butter and gives you a much brighter white. Simply replace the shortening with an additional 50–75g of unsalted butter.
Can I make it in advance?
Best made fresh, but it keeps in an airtight container at room temperature for a day, or in the fridge for up to 5 days. When you’re ready to use it, bring it back to room temperature and whip it up again.
Will it melt?
Swiss Meringue Buttercream is far more stable than American buttercream — but it still contains butter, so heat is its enemy. Keep cakes refrigerated as much as possible on warm days and bring them out just before serving.
My meringue won’t whip up.
Almost always a fat contamination issue. Make sure your bowl, whisk, and spatula are completely clean and free of any grease — wipe everything down with vinegar or lemon juice before you start. Also check that no egg yolk has snuck into the whites.