I’ve wanted to share this one for a while. It started as a question I kept coming back to in my head: what if you could get three distinct cake flavours — vanilla, milk chocolate, and rich dark chocolate — from a single batter, without the faff of making three separate recipes?
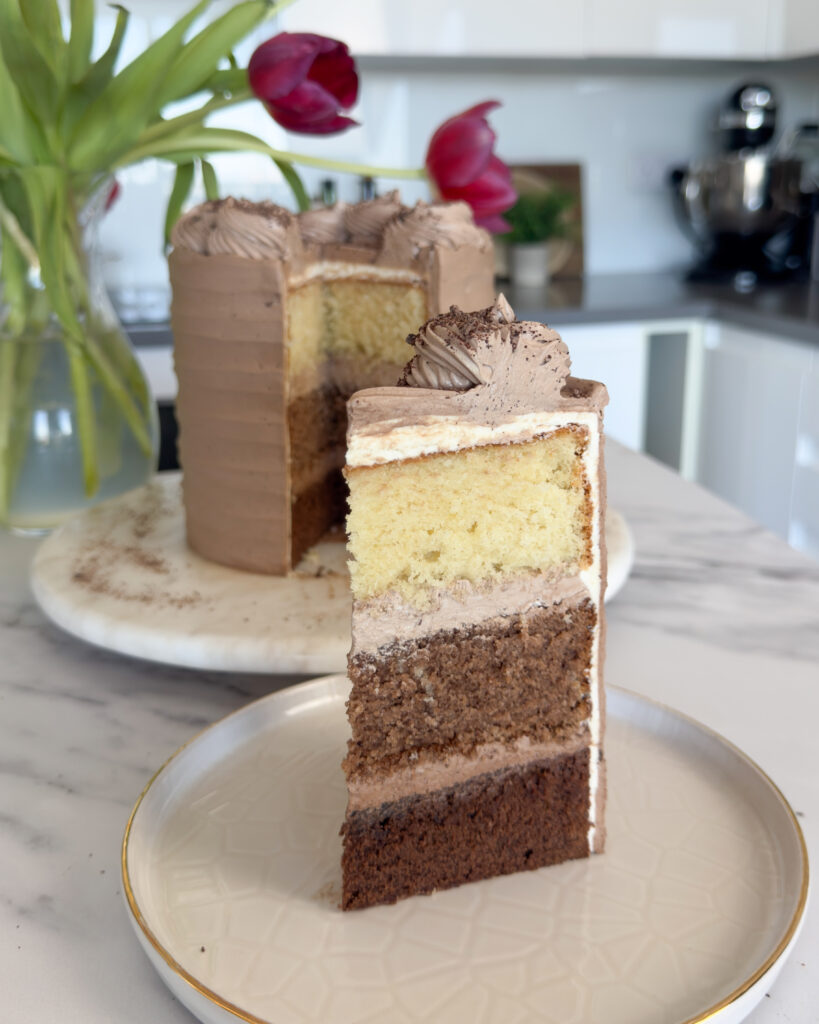
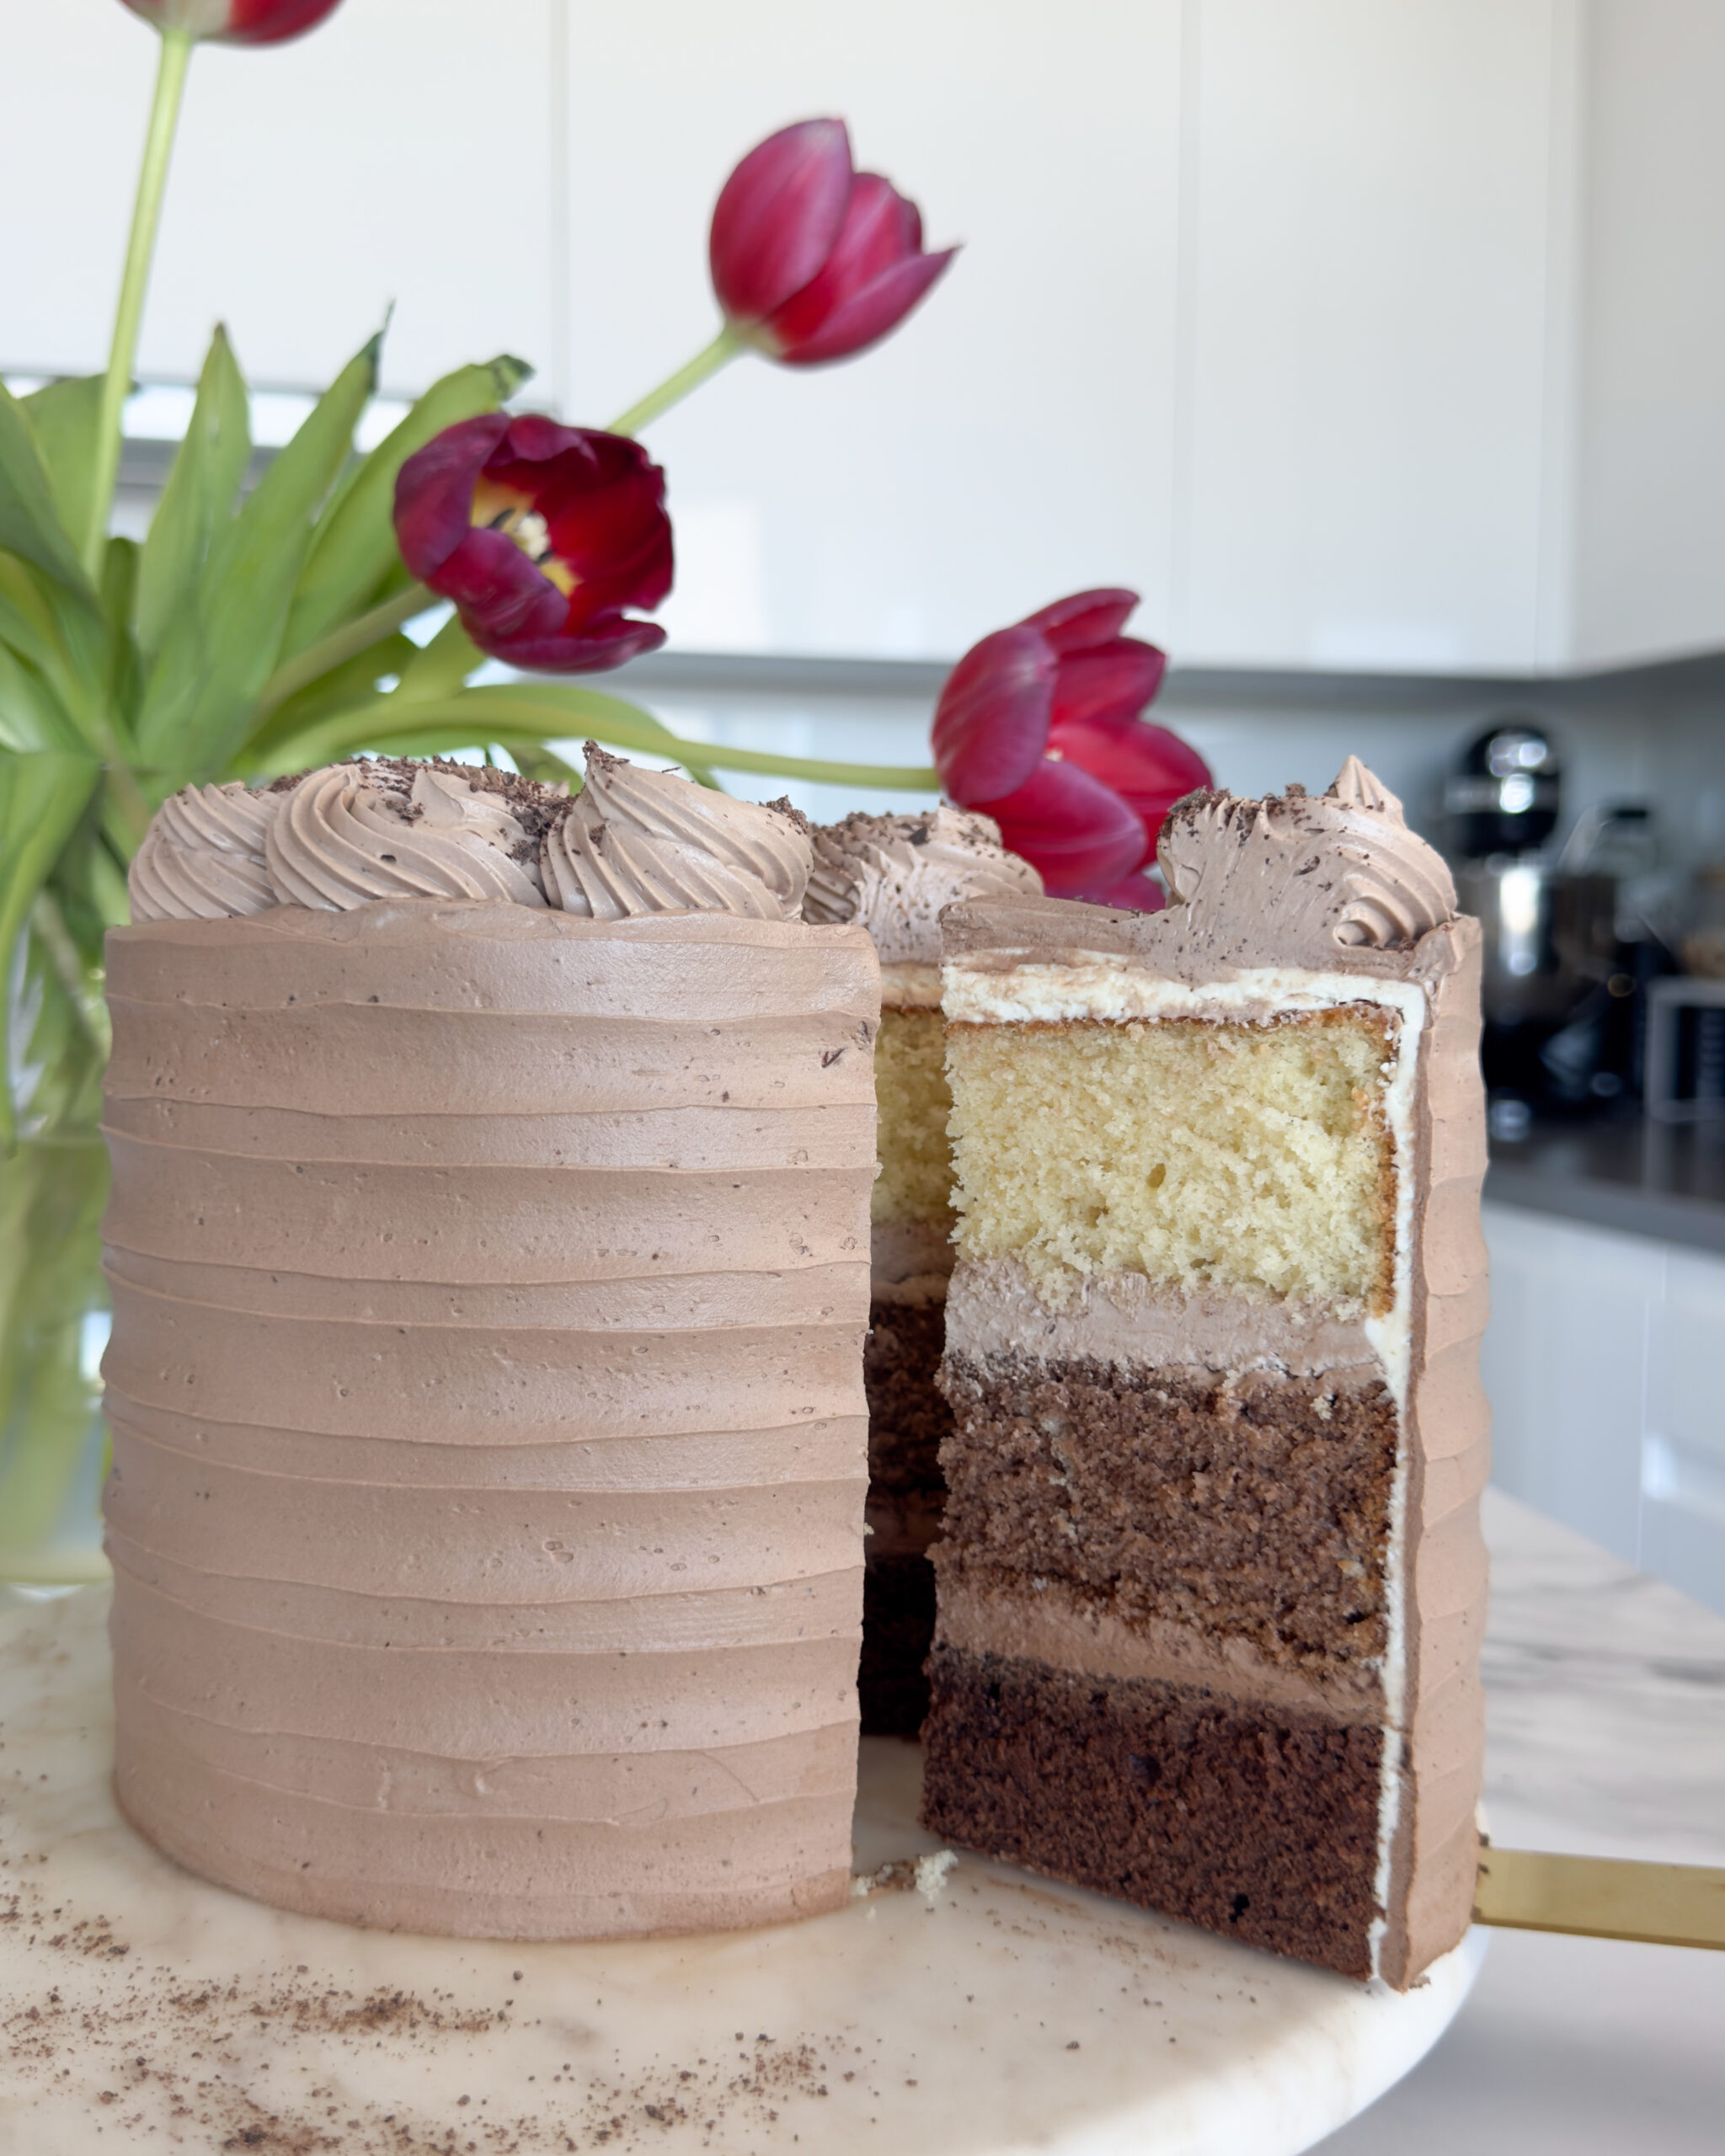
The answer is this cake. One base batter, split into three, with each portion adapted just enough to give you a graduated flavour and colour from top to bottom. When you slice into it you get a clean shift from pale vanilla through to a deep chocolate base, and every layer has the same soft, even crumb. It’s one of those bakes that looks much more complicated than it is, and I mean that as a compliment to the technique, not an undersell of the result.
The base is my go-to vanilla cake — the one I’ve been making for years and the one that never lets me down. The buttercream is my super versatile Swiss meringue recipe, flavoured two ways: milk chocolate for the filling between the top layers, and dark chocolate for the base. If you’ve made either of those recipes before, this will feel very familiar. If you haven’t, both are linked throughout this post and worth reading before you start.
Why One Batter?
The obvious and most important answer is convenience — one set of equipment to wash, one batter to make. Of course it would be great to make three different recipes that are absolutely perfect for each of the flavours but let’s be honest… who has the time?
I’ve trialled this recipe a few times and this one was the best version.
The adjustments for the chocolate layers are minimal — cocoa powder, a small amount of melted chocolate, and a little extra liquid to compensate for the thickening effect of the cocoa. That’s it.
A Note on the Chocolate Layers
Cocoa powder absorbs liquid, which means adding it to a batter without compensating will give you a denser, drier layer. The fix is straightforward: a tablespoon or two of milk or buttermilk added alongside the cocoa keeps the consistency in line with the vanilla portion.
For the middle layer, a small amount of melted milk chocolate adds a gentle sweetness and a slightly fudgier quality without overwhelming the crumb. For the base layer, melted dark chocolate gives you a deeper, more pronounced chocolate flavour and a richer colour — this is the layer that anchors the whole cake.
The goal is for all three layers to look and feel similar when they come out of the oven, with the difference being in colour and flavour rather than texture. If the chocolate batter feels noticeably thicker than the vanilla, add milk one tablespoon at a time until they match.

On the Buttercream
I use my Swiss meringue buttercream for this cake, flavoured in two ways. The full base recipe and method is on the blog here — make a full batch before you start.
For the milk chocolate SMBC: melt 50-75g of good quality milk chocolate, allow it to cool to room temperature, then fold it through a portion of your finished buttercream. It should be smooth, silky, and a pale milk-chocolate brown.
For the dark chocolate SMBC: do the same with 50-75g of melted dark chocolate (70% works well here). The flavour is deeper and slightly less sweet, which balances beautifully against the richness of the chocolate base layer.
Use the milk chocolate buttercream between the top two layers and for the crumb coat. The dark chocolate buttercream works best as the outer finish — it gives the cake a beautiful deep colour and a flavour that builds from the first slice through to the last.
Triple Layer Vanilla and Chocolate Cake
Makes 3 × 6-inch layers · Serves 10–12
The Vanilla Batter
Make one full batch of my vanilla cake recipe. The full ingredients and method are on that post — read it through before you start if it’s your first time making it.
Once the batter is ready, weigh the total and divide it equally into three bowls. Weighing rather than eyeballing is important here — even layers mean an even bake. For me, each of the layers is about 400-425g.
Adapting the Three Portions
Bowl 1 — Vanilla (top layer)
Leave this portion exactly as it is. No additions needed.
Bowl 2 — Milk Chocolate (middle layer)
Add to the second portion:
- 1 tsp cocoa powder (sifted)
- 1-2 tbsp milk
- 20-30g melted milk chocolate, cooled to room temperature (optional but recommended)
Fold together carefully until smooth and evenly combined. The colour should be a light, warm brown.
Bowl 3 — Dark Chocolate (base layer)
Add to the third portion:
- 1.5 tbsp cocoa powder (sifted)
- 40-50g melted dark chocolate, cooled to room temperature
- 2-3 tbsp milk
Mix carefully until fully combined. The batter should be noticeably deeper in colour than the milk chocolate portion but still smooth and easy to pour.
Consistency Check
Before baking, compare all three batters side by side. They should look similar in texture — smooth, light, and pourable. If either chocolate portion feels thicker than the vanilla, add milk one tablespoon at a time and fold carefully through until they match. This step is worth taking the time over and you don’t want to overmix.
Baking
Preheat your oven to 190°C (170°C fan). Grease and line three 6-inch cake tins.
Pour each batter into its own prepared tin and smooth the tops. Bake at 170°C fan for 22–25 minutes, or until a skewer inserted into the middle comes out clean. Given these are three different sponges, check each one individually — ovens vary and the chocolate layers may bake slightly differently to the vanilla. Allow the cakes to cool in their tins for 7-10 minutes, then turn out onto a wire rack and leave to cool completely before assembling.
Assembly
Layer in this order, bottom to top:
- Dark chocolate layer (base)
- Milk chocolate layer (middle)
- Vanilla layer (top)
Fill between each layer with milk chocolate Swiss meringue buttercream, chocolate ganache or whatever buttercream you prefer. Apply a thin crumb coat all over the cake, then refrigerate for 15–20 minutes to set. Finish with the dark chocolate Swiss meringue buttercream as the outer layer, smoothed with a palette knife or bench scraper to whatever finish you prefer.
Finish with chocolate shavings, chocolate curls, or a scatter of cocoa powder — keep the decoration in line with the simplicity of the cake itself.
Notes & Tips
- Weigh the batter into equal portions rather than dividing by eye — it makes a real difference to the final layers.
- Avoid overmixing once the cocoa powder is added. Fold it through until just combined.
- The baked layers can be wrapped and refrigerated overnight before assembling. They’re actually easier to work with once they’ve had time to rest and firm up slightly.
- Make the full batch of Swiss meringue buttercream before you start assembling. It’s much easier to flavour and divide when you have the full quantity in front of you.
Triple Layer Cake Questions, Answered
Do I need to make the full vanilla cake recipe before splitting it? Yes — make the complete vanilla batter as written if you want enough batter for three 6” layers, then weigh and divide it into three equal portions before adapting each one. Don’t try to scale individual portions separately as the ratios won’t work in the same way.
Can I use a different base vanilla recipe? You can, but the bake times and consistency checks in this post are based on my vanilla cake recipe specifically. If you use a different base, you may need to adjust the liquid additions for the chocolate layers depending on the consistency of your batter.
Can I use shop-bought buttercream instead of Swiss meringue? You can, but Swiss meringue buttercream gives you a significantly smoother, less sweet finish that works much better with the depth of the chocolate layers. American-style buttercream can overpower the more subtle vanilla and milk chocolate flavours. Or you go full chocolate and fill the cake with chocolate ganache.
How do I store the finished cake? Keep in an airtight container. It will hold well at room temperature for 2–3 days, or in the fridge for up to 5 days. If refrigerating, allow it to come back to room temperature.
Can I freeze the layers? Yes — freeze the unfrosted layers individually, well wrapped in cling film then foil, for up to a month. Defrost at room temperature before assembling.
One Last Thing
This is a cake that rewards a little patience — letting the layers cool completely, taking time over the consistency check before baking, giving the crumb coat time to set before the final layer of buttercream. None of it is complicated. It just asks you to slow down slightly, which I’d argue is a good approach to most baking.
When you slice into it and see those three distinct layers — the clean gradient from pale vanilla through to deep chocolate — it’s genuinely one of the most satisfying things you can pull out of the oven and worth every minute.