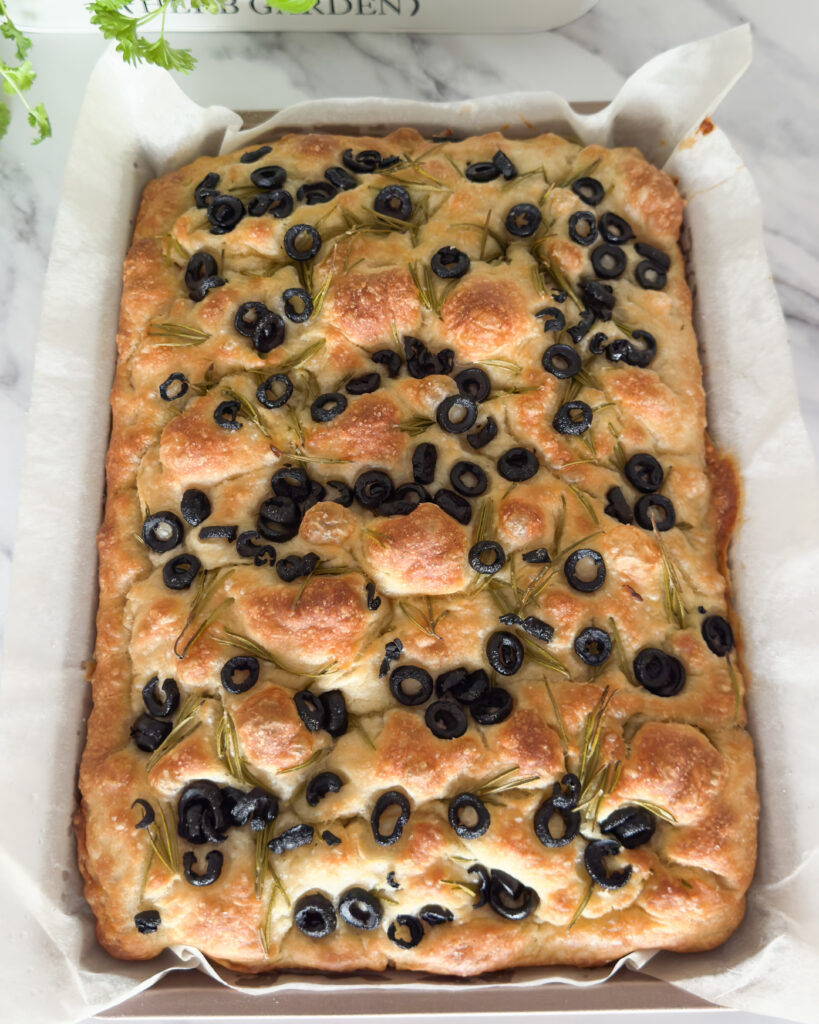
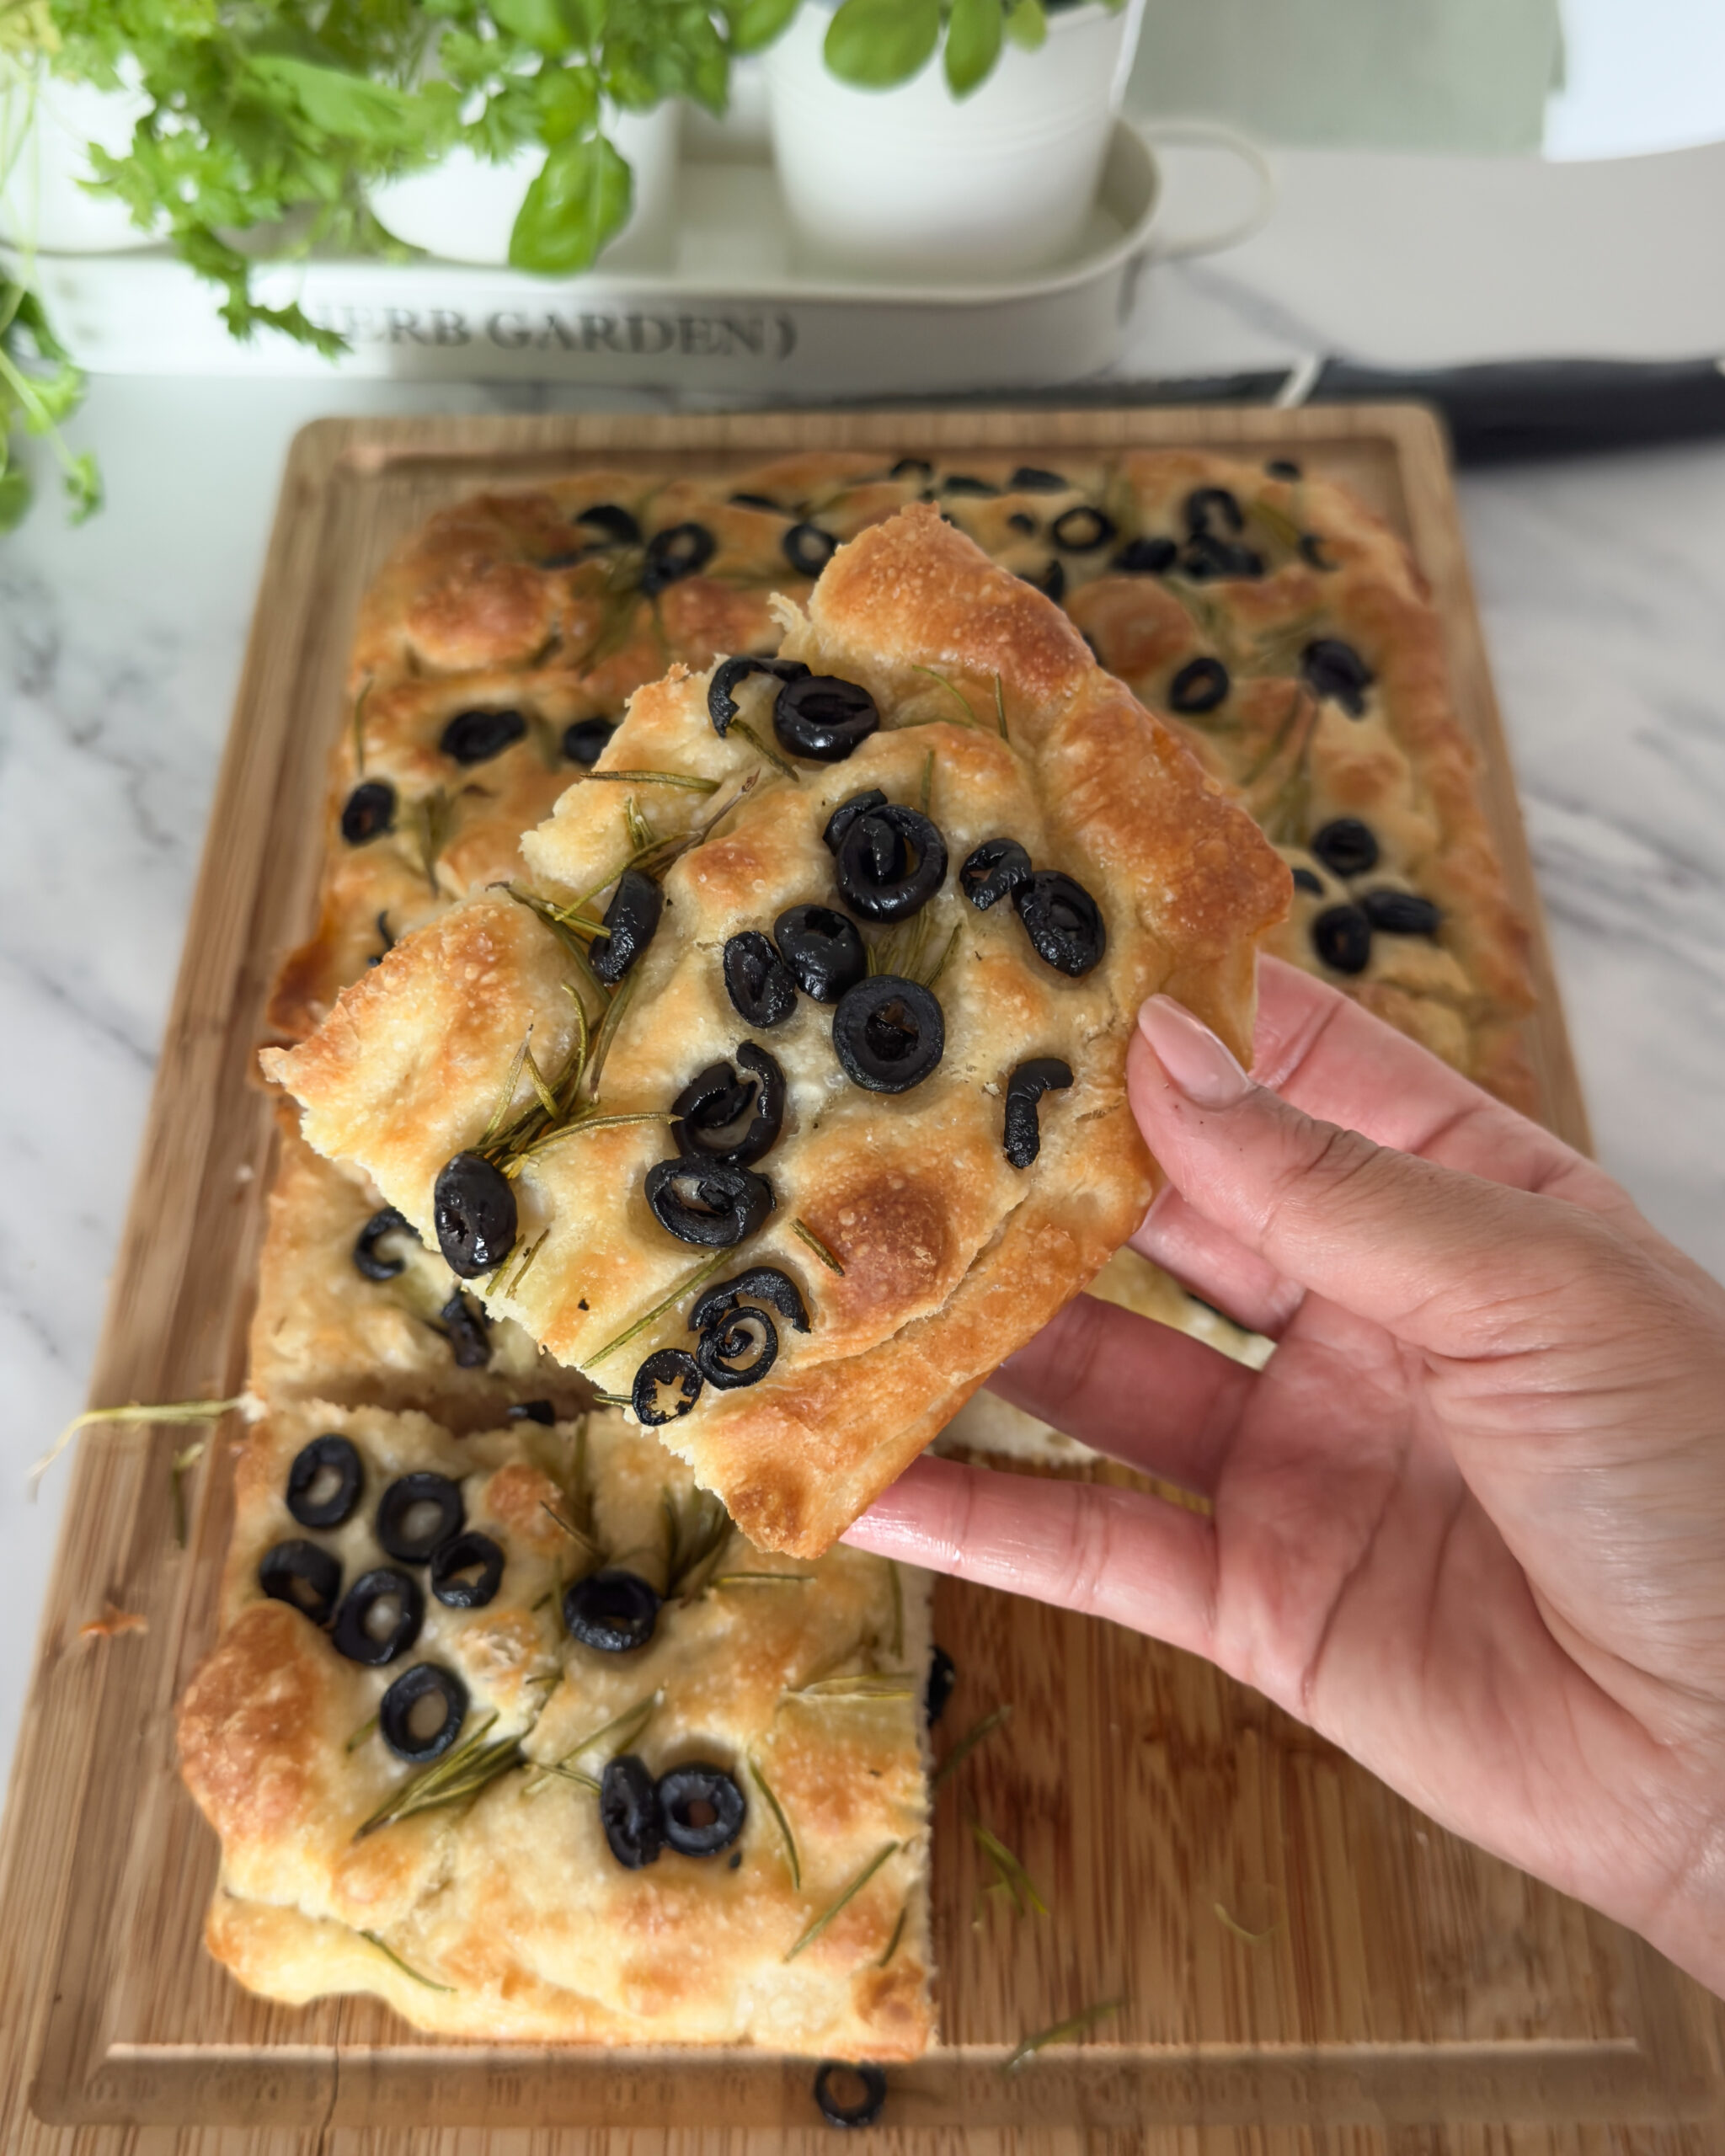
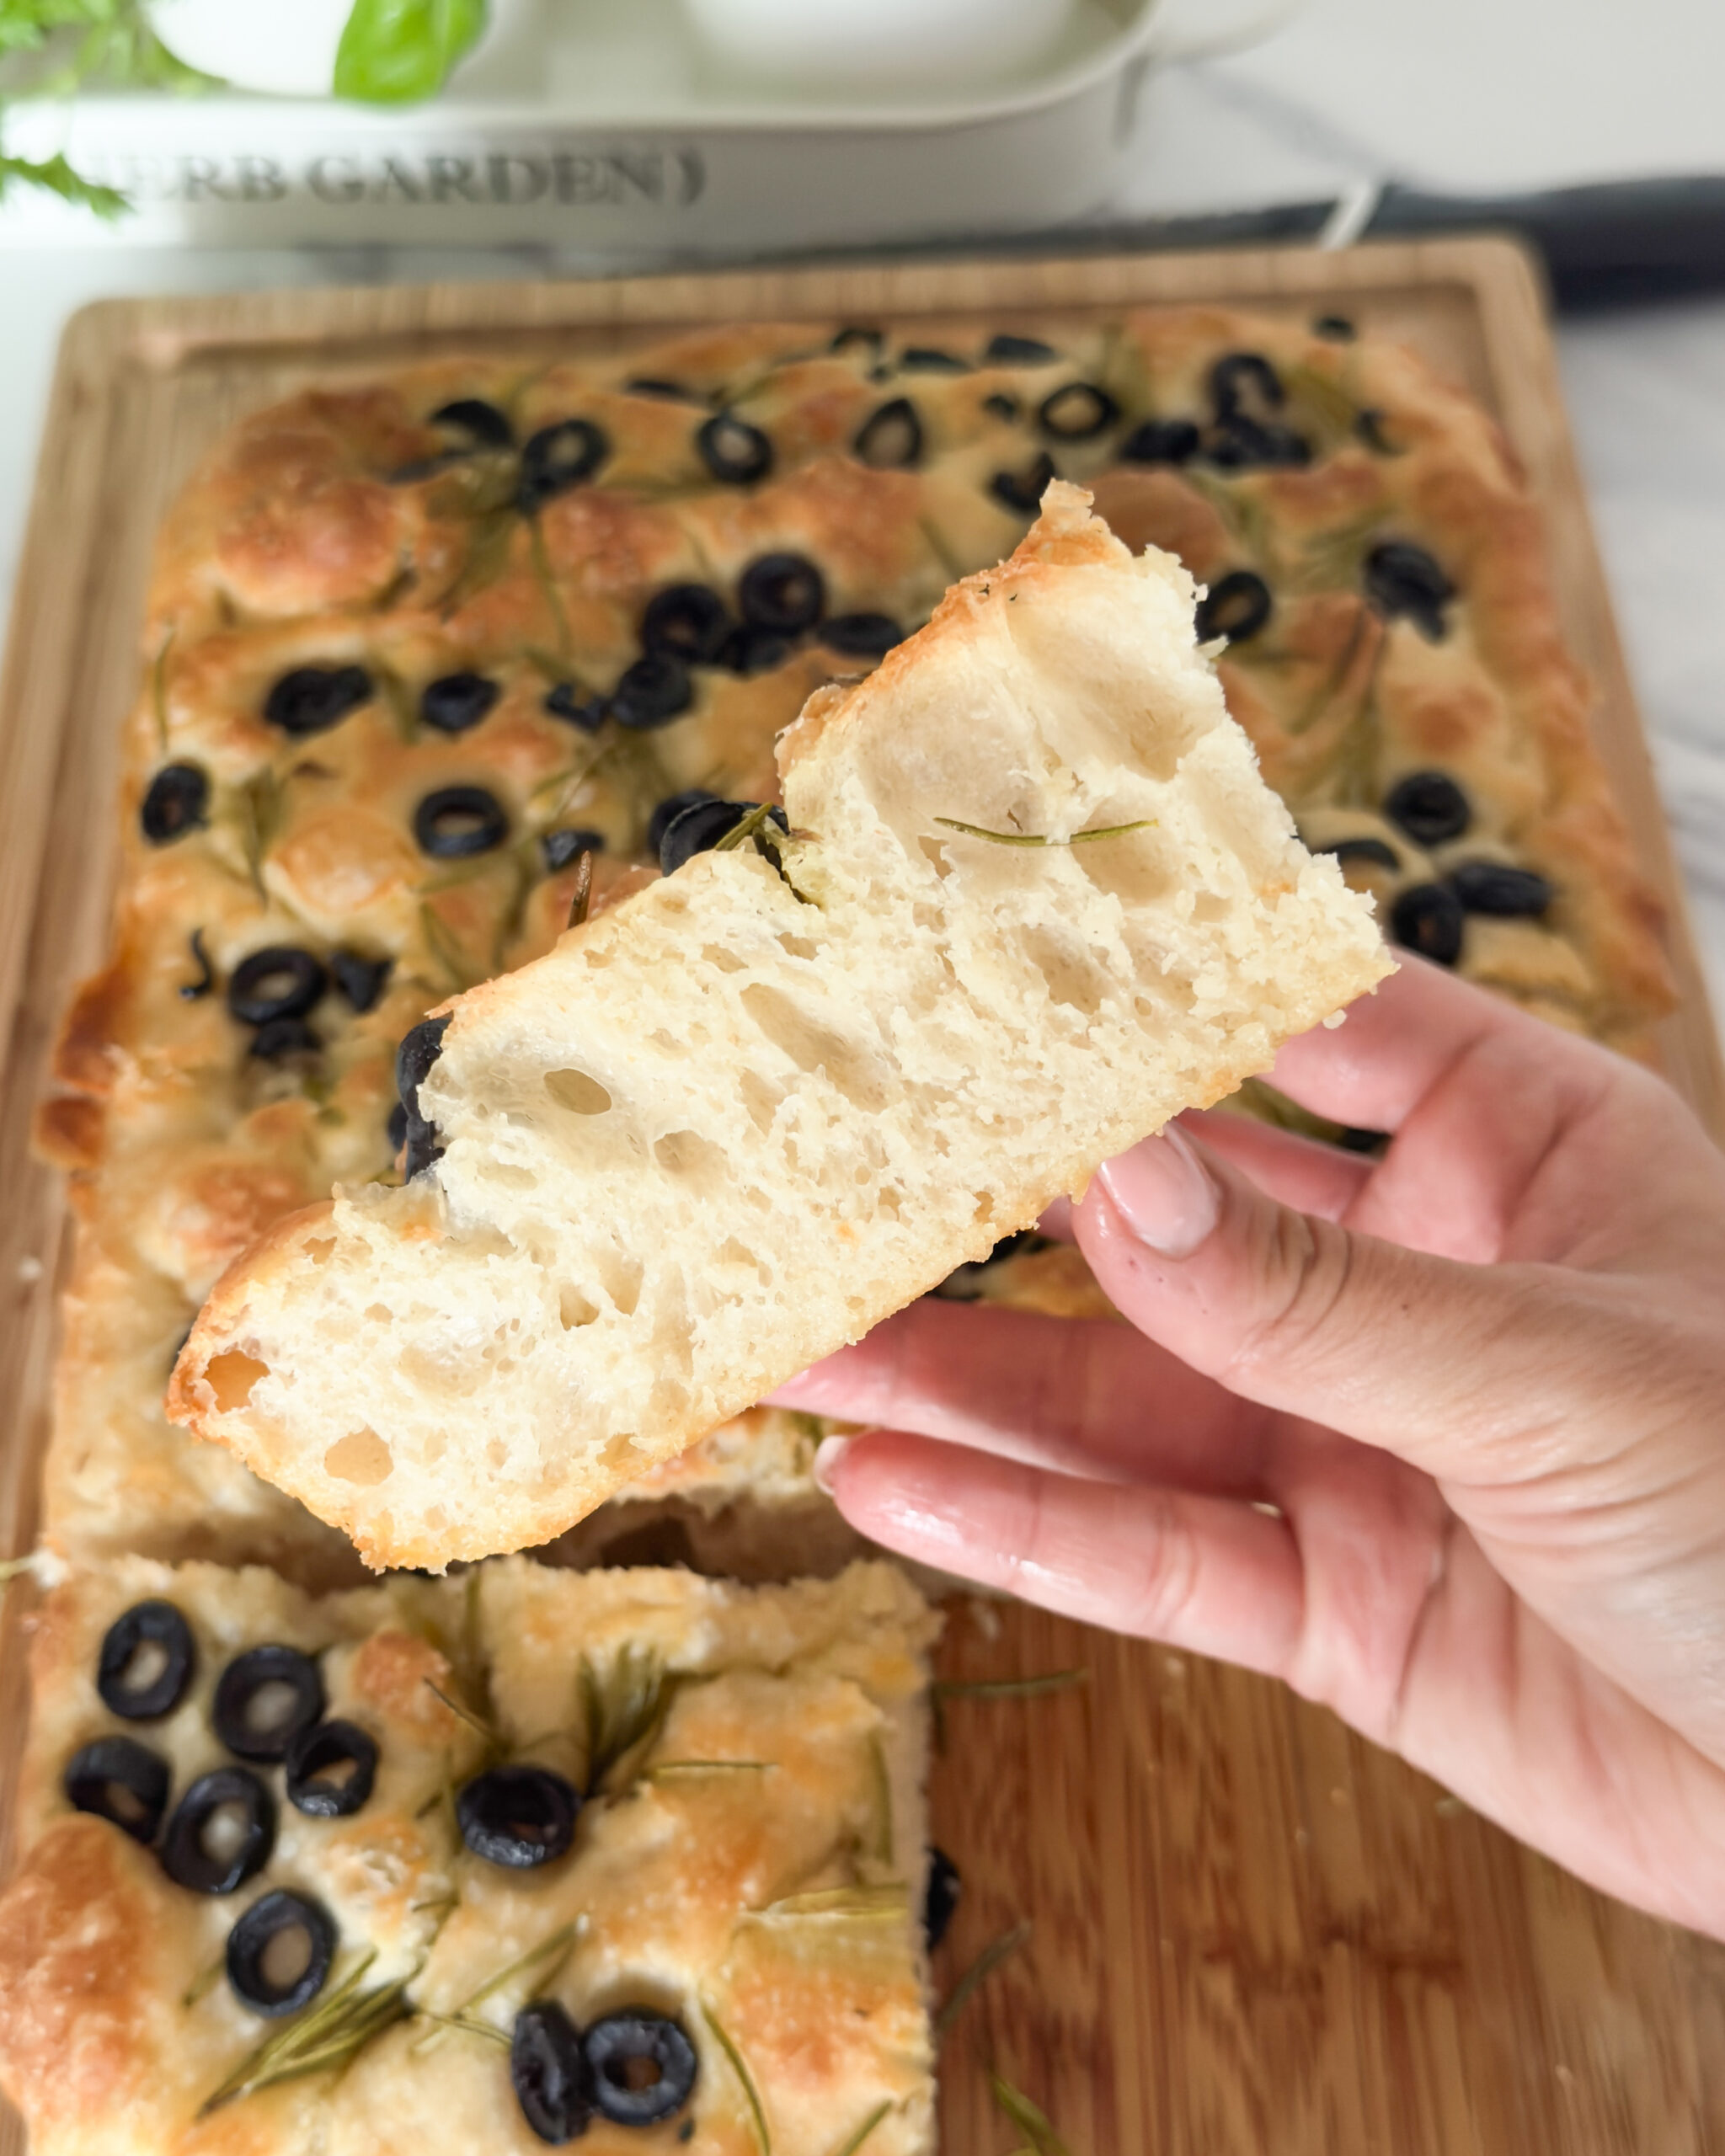
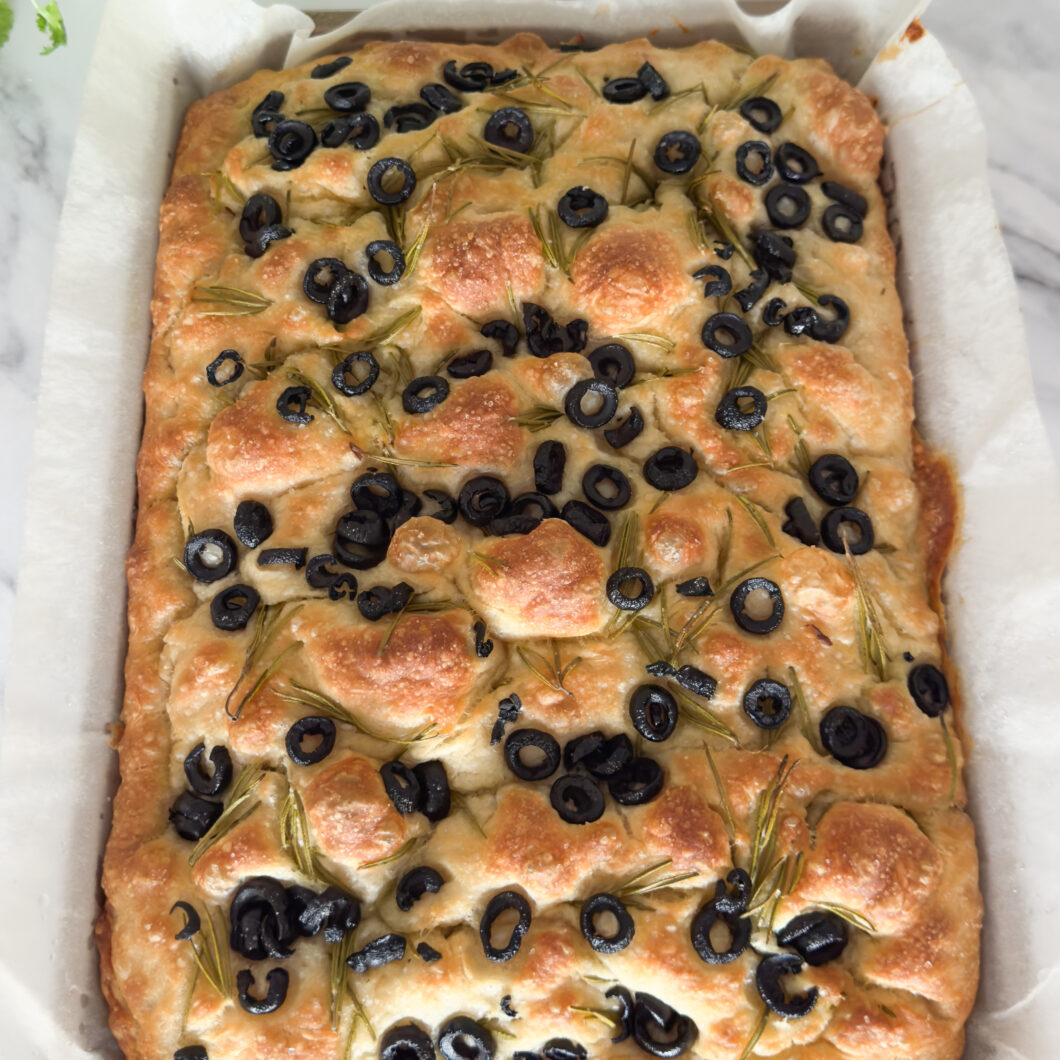
If you’ve been looking for an easy focaccia recipe that doesn’t need a stand mixer, hours of kneading, or any bread-baking experience at all, this is the one to bookmark. It’s soft and airy inside, deeply golden and crisp on top, and studded all over with salty olives, fresh rosemary and pools of good olive oil. Best of all, the whole thing comes together by hand in one bowl and you can eat it the same day.
I make this focaccia on repeat, alongside a big bowl of salad, next to a platter of roasted vegetables, or torn straight from the tin while it’s still warm from the oven. It makes a kitchen smell like an Italian bakery, and it’s far more forgiving to make than you’d think.
Why You’ll Love This Focaccia Recipe
- No stand mixer, no kneading. A few gentle stretch-and-folds do all the work.
- Deliberately wet dough. The high hydration is the secret to those big, irregular bubbles and a light, open crumb.
- Big on flavour. Fruity olive oil, briny olives and fresh rosemary in every bite.
- Great for sharing. One large tin feeds a crowd, and it’s ideal for slicing up for lunch, snacking, or serving alongside dinner.
- Freezer-friendly. Make a batch and freeze the extra for busy weeks.
A Little History of Focaccia
Focaccia is one of the oldest breads in Italy, with roots stretching back to the Ligurian coast around Genoa. Its name comes from the Latin panis focacius — bread baked on the hearth, or focus — a nod to how Etruscan and Roman bakers once cooked flatbreads directly on hot stones or embers, long before ovens as we know them existed.
Over the centuries, every Italian region shaped it in its own way. In Liguria, focaccia is thin, dimpled and glossy with olive oil, traditionally dipped into a morning cappuccino. Head south to Puglia and it turns thicker and softer, topped with tomatoes and oregano. In Recco, near Genoa, there’s even a version stuffed with soft cheese instead of toppings altogether.
This recipe leans closer to the Ligurian style — olive oil-rich, deeply dimpled, and topped simply so the bread itself gets to be the main event. Adding olives and rosemary is my own spin, inspired by the version I keep coming back to on every trip to Italy.
Ingredients for Olive & Rosemary Focaccia
Here’s what you’ll need to make this recipe, along with a few notes on each.
- Plain flour – no need for strong bread flour here; plain flour gives a lovely soft, tender crumb.
- Warm water – this is a high-hydration dough, which is what makes it so soft and bubbly. Don’t be tempted to add extra flour to make it easier to handle.
- Fast-action dried yeast – no proofing required beyond the initial 5-minute rest with the water and sugar.
- Caster sugar – just a touch, to help the yeast get going.
- Fine sea salt – for the dough itself.
- Extra virgin olive oil – used three ways: in the dough, in the tin, and drizzled on top. Use a bottle you’d happily drizzle over a salad, as the flavour really comes through.
- Olives – green, Kalamata, or a mixture of both work beautifully. Just make sure they’re well drained so they don’t add excess moisture to the dough.
- Fresh rosemary – roughly chopped, so you get little bursts of it throughout.
- Flaky sea salt – for topping, once the focaccia comes out of the oven’s dimples and before it goes into the oven.
How Focaccia Actually Comes Together
This isn’t a bread that asks much of you, but it helps to understand why each stage matters before you get started — that way you’ll know exactly what you’re looking for at every point.
The yeast mixture should look alive before you carry on. Warm water, a pinch of sugar and the yeast need about 5 minutes together. You’re looking for a light foam on the surface — that’s your sign the yeast is active. If nothing happens after 10 minutes, your water was likely too hot or too cold, and it’s worth starting again rather than pushing on with a dead mixture.
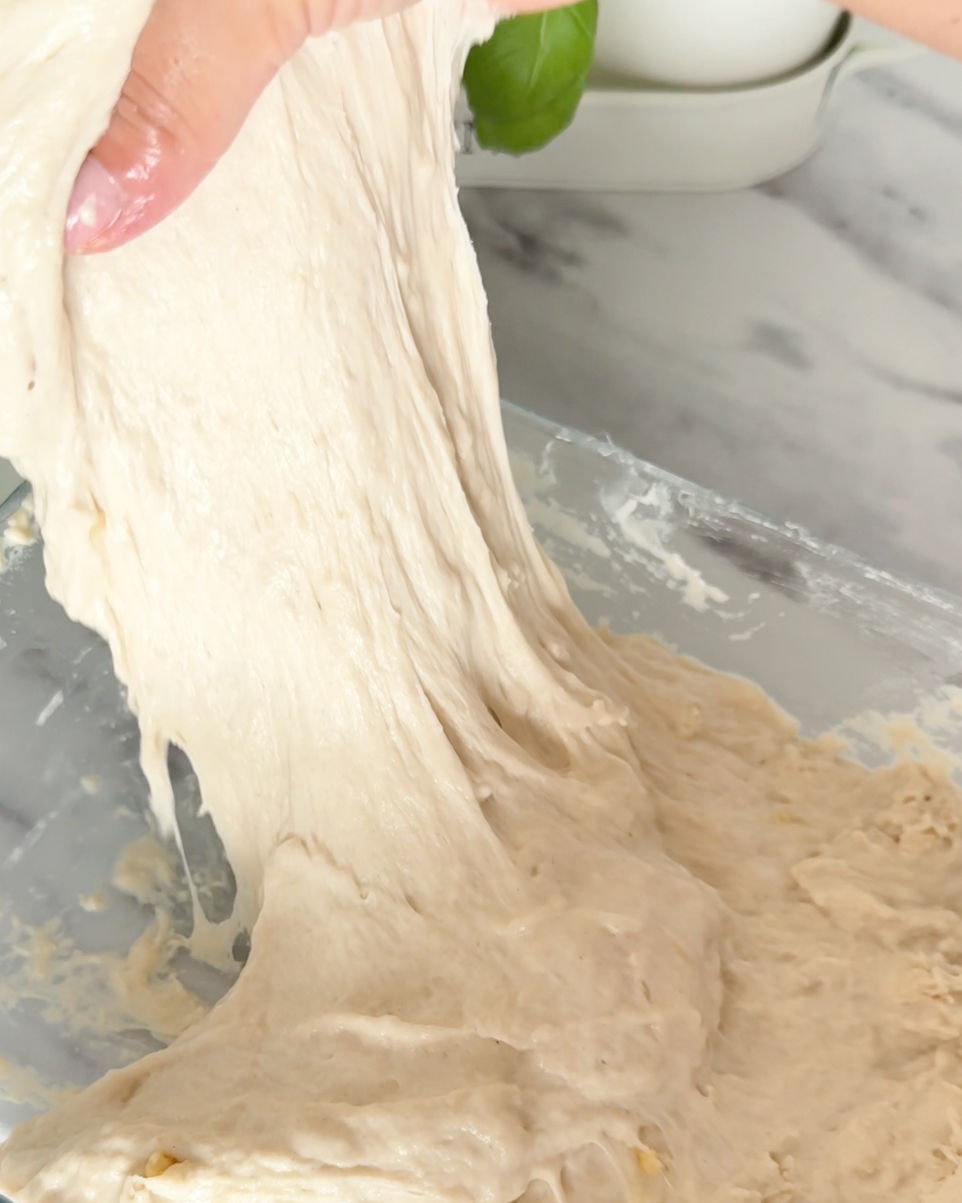
The dough is meant to look wrong. Once the flour and salt go in, you’ll end up with something closer to a thick batter than a dough. This is a high-hydration recipe, and that wetness is exactly what gives focaccia its open, bubbly crumb — resist any urge to work in extra flour.
Folding replaces kneading entirely. Rather than working the dough on a surface, you’ll fold it inside the bowl with wet or oiled hands, lifting one edge up and over into the middle, then rotating and repeating. Two short rounds of this, with a brief rest in between, is enough to build all the structure this loaf needs.
Give the first prove real time. An hour to ninety minutes in a warm spot lets the dough double and develop those large, irregular air pockets. A cooler kitchen will simply take longer — don’t rush it by turning up the heat, or you’ll lose the slow fermentation flavour.
Oil is doing double duty in the tin. A generous layer across the base stops the dough sticking and helps the underside crisp and caramelise as it bakes, almost like shallow-frying the bottom of the loaf.
Stretch gently, and let the dough tell you when it’s ready. Once it’s in the tin, coax it towards the corners with oiled fingertips. If it keeps springing back, that’s the gluten telling you it needs a short rest — five to ten minutes usually does it.
The second prove is shorter but just as important. Forty to fifty minutes gives you a visibly puffed, pillowy dough. Skip this step and you’ll end up with a denser, flatter bake.
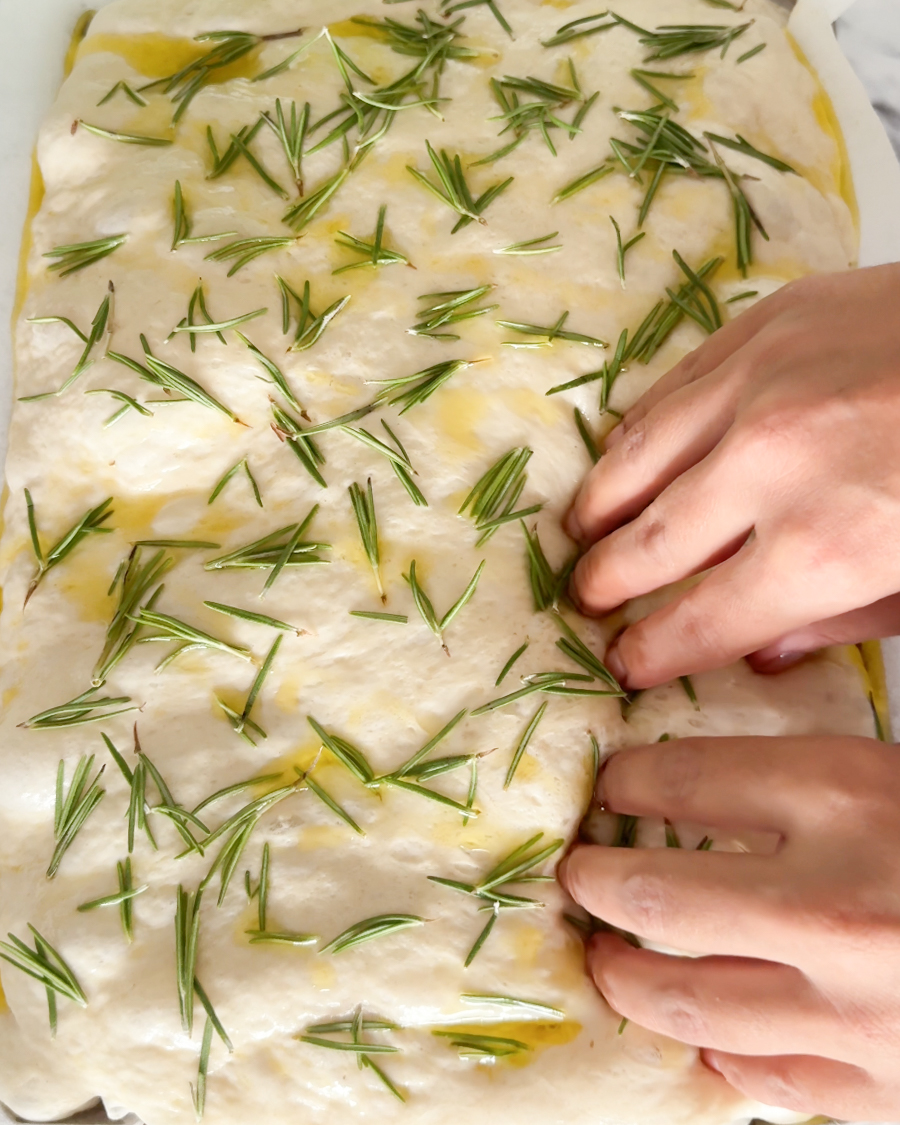
Dimpling is where the character comes from. Press your fingertips firmly all the way down to the base of the tin — this is what creates focaccia’s signature craggy surface and lets pools of olive oil settle into every dip. Nestle in the olives, scatter the rosemary, and finish with flaky salt before it goes in the oven.
A hot oven does the rest. 220°C (200°C fan) for 22–28 minutes is enough to turn the top deeply golden and the edges properly crisp.
Let it rest before slicing. Ten minutes in the tin allows the crumb to set slightly, so you get clean slices rather than a squashed one.
Tips for the Best Focaccia
- Trust the wet dough. It’ll look far too sticky to be right, but resist adding extra flour. The higher hydration is what gives focaccia its signature light texture and big air pockets.
- Keep your hands wet or oiled. This makes the dough much easier to handle at every stage, from folding to stretching.
- Be gentle after the first prove. To keep those large bubbles intact, avoid pressing all the air out when you move the dough into the tin.
- Let it relax if it resists. If the dough keeps springing back as you stretch it, give it a short rest rather than forcing it into shape.
- Drain the olives well. Excess brine can make the dough soggy where the olives sit.
Variations to Try
This focaccia recipe is easy to adapt once you’ve got the base method down. Try scattering over any of the following alongside, or instead of, the olives and rosemary:
- Thinly sliced garlic
- Thinly sliced red onion
- Halved cherry tomatoes
- A little grated Parmesan
Frequently Asked Questions
Can I make focaccia dough ahead of time? Yes. After the first prove, you can cover the dough and refrigerate it overnight. Bring it back to room temperature before shaping and continuing with the second prove.
Why is my focaccia dough so sticky? It’s meant to be. This is a high-hydration dough, and that wetness is exactly what gives focaccia its soft, open crumb. Wet or oiled hands make it much easier to work with.
Can I use a different tin size? A 23 x 33cm tin gives you the classic thickness for this recipe, but a slightly smaller tin will give you a thicker, more pillowy focaccia, while a larger one will bake up thinner and crisper. Keep an eye on the bake time either way.
How do I store leftover focaccia? Keep it in an airtight container or wrapped tightly at room temperature for up to 2 days. To refresh, warm it in the oven for a few minutes before serving.
Can I freeze focaccia? Yes. Once fully cooled, wrap it tightly and freeze for up to 2 months. Thaw at room temperature, then warm through in the oven.
What can I serve with focaccia? It’s lovely alongside soup or pasta, as part of an antipasti spread, or simply on its own with extra olive oil for dipping.
Easy Olive & Rosemary Focaccia
A soft, airy focaccia with a golden crust, plenty of olive oil, fresh rosemary and salty olives. This version is mixed entirely by hand, so there's no stand mixer or traditional kneading required.
30
minutes25
minutes2
hoursIngredients
510 grams 510 plain flour
420 ml 420 warm water
7 g 7 fast-action dried yeast
2½ tsp 2½ caster sugar
2 tsp 2 fine sea salt
90 ml 90 extra virgin olive oil, divided
70-100 g 70-100 pitted olives, sliced
1-2 tbsp 1-2 fresh rosemary, roughly chopped
Flaky sea salt, for topping
Directions
- Start the yeast.
Pour the warm water into a large mixing bowl and stir in the sugar. Sprinkle over the yeast, stir briefly and leave for around 5 minutes, until the mixture looks slightly foamy. - Mix the dough.
Add the flour and fine sea salt. Mix everything together with a wooden spoon or dough whisk until there are no dry patches of flour remaining. The dough will be very soft, wet and sticky – this is exactly how it should look. - Rest and fold.
Leave the dough to rest for 15 minutes. Wet or lightly oil your hand, then grab one side of the dough, gently stretch it upwards and fold it over towards the centre. Rotate the bowl and repeat until you've made around 8–10 folds. Leave the dough to rest for another 10 minutes, then repeat the folding process once more. - First prove.
Pour around 30ml of the olive oil into a clean large bowl. Transfer the dough to the bowl and turn it gently so it's lightly coated in oil. Cover and leave somewhere warm for 1–1½ hours, or until roughly doubled in size. - Prepare the tin.
Pour another 30ml olive oil into a 23 × 33cm baking tin and spread it generously across the base and sides. If your tin isn't particularly non-stick, lightly grease it before adding the oil. - Transfer the dough.
Tip the risen dough into the prepared tin and gently turn it over once so both sides are coated in olive oil. Using lightly oiled fingertips, carefully stretch the dough towards the edges of the tin. If it springs back, leave it to relax for 5–10 minutes, then try again. - Second prove.
Cover the tin and leave the dough somewhere warm for 40–50 minutes, until it's visibly risen and pillowy. - Preheat the oven.
Towards the end of the proving time, preheat your oven to 220°C / 200°C fan. - Add the toppings.
Pat the sliced olives dry with kitchen paper to remove any excess brine.
Drizzle the remaining 30ml olive oil over the risen dough. Lightly oil your fingertips, then press them firmly into the dough to create deep dimples across the entire surface.
Gently press the sliced olives into the dimples, then scatter over the fresh rosemary and a generous pinch of flaky sea salt. - Bake.
Bake for 22–28 minutes, until the focaccia is deeply golden on top and crisp around the edges. - Cool and serve.
Leave the focaccia in the tin for around 10 minutes, then carefully remove and transfer to a wire rack. Serve warm or at room temperature, with an extra drizzle of olive oil if you fancy.
Notes
- Don't add extra flour: The dough is deliberately very wet and sticky. A higher-hydration dough helps create the light, airy texture and lovely irregular bubbles inside.
Use wet or oiled hands: It'll make handling and folding the sticky dough much easier.
Olives: Green olives, Kalamata olives or a combination of the two all work beautifully. Make sure they're well drained before adding them.
For bigger bubbles: Be gentle with the dough after its first prove. When transferring it to the tin, avoid pressing all the air out of it.
Make it your own: You can add thinly sliced garlic, red onion, cherry tomatoes or a little grated Parmesan alongside the olives and rosemary.
Give this olive and rosemary focaccia a try and let me know how it turns out in the comments below. If you make it, I’d love to see — tag your photos so I can find them.